
The Bishops Hat is the only fold that spreads the pocket square above, below, and to all sides of your breast pocket. Because of the size and the spread, it is quite a loud fold. It is suitable for any pocket square style, although I suggest a bright and loud pocket square to compliment the eccentric nature of this unusual fold. Here are the 11 steps to create this fold:
Bishop’s Hat Fold Step-by-Step:
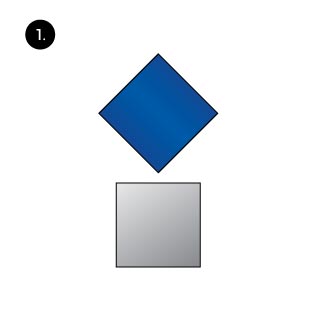
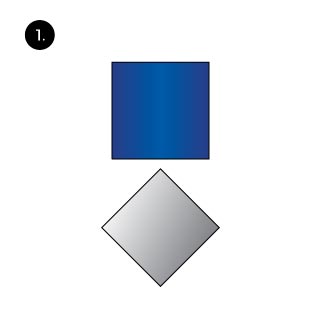
 Lay the pocket square down flat.
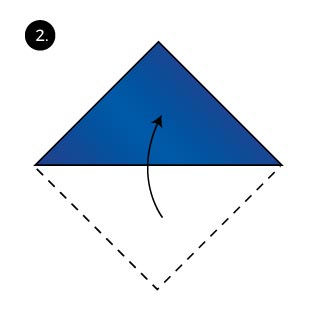 Fold it into a triangle.
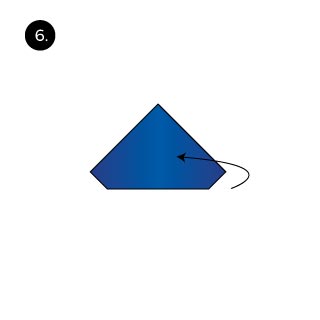
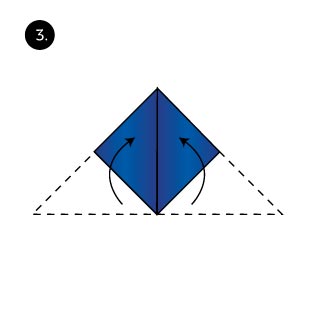 Fold up the outer corners to meet the top of the triangle. This creates a square.
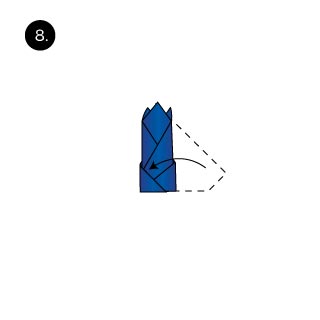
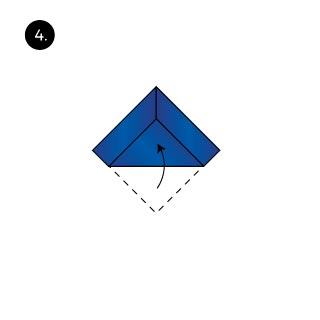 Now fold in a portion of the lower corner.
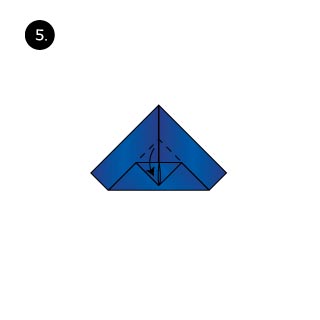 Fold down the tip of the inner triangle.
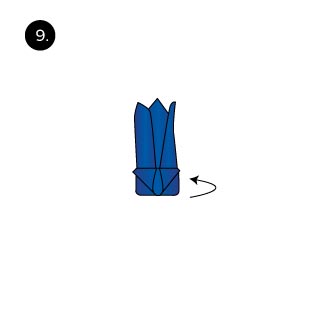
 Turn the pocket square over.
 Fold in one of the sides.
 Fold in the other side and tug the corner in to keep the fold secure.
 Turn the pocket square over again.
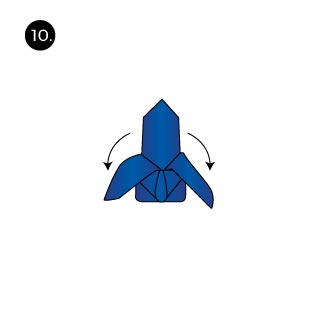 Fold down the outer tips.
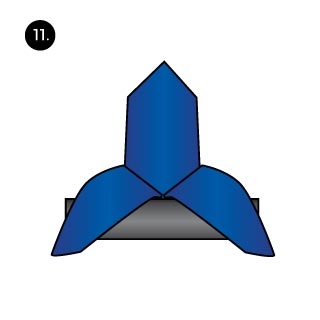 At last, tug into your breast pocket and style to suit your liking.

 Lay the pocket square down flat.
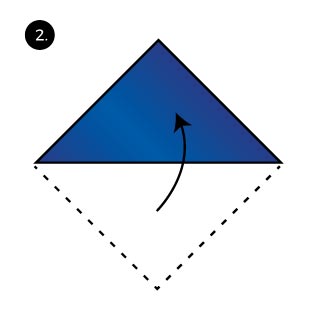 Now told it into a triangle.
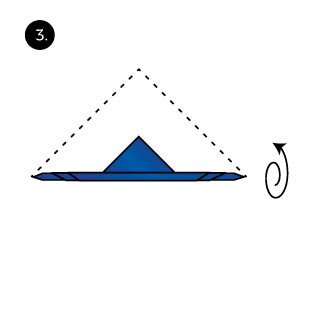 Roll up from the long side of the triangle but leave about 2 inches of the top.
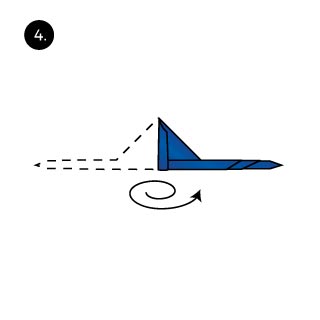 Now start rolling from one of the sides.
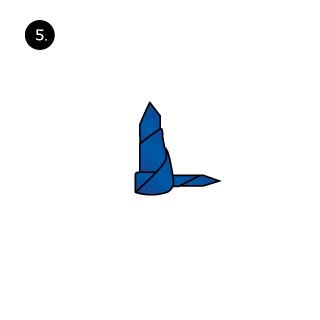 Roll up but leave about 2 inches of one side.
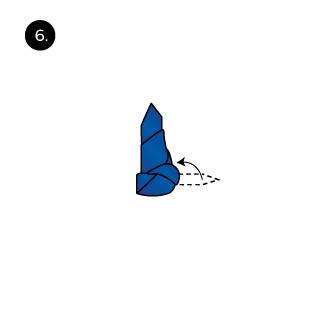 Take this left over piece and tug it into one of the wrappings. This secures the roll.
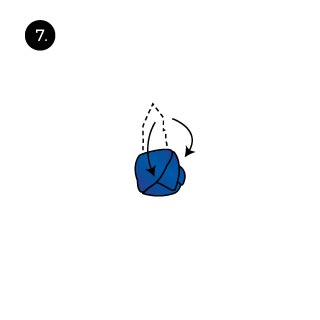 Pull down the upper portion to create the two leaves of the rose. There should be two pieces that are pulled down next to the actual rose blossom.
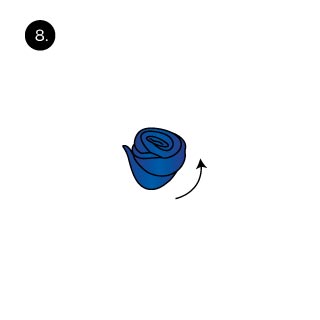 Turn the pocket square around.
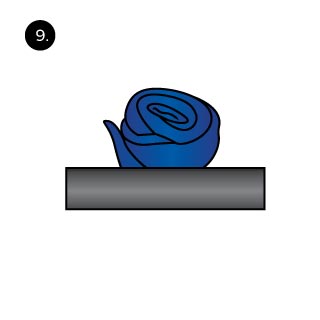 Place into your breast pocket and style to your liking.
 Lay the pocket square down flat.
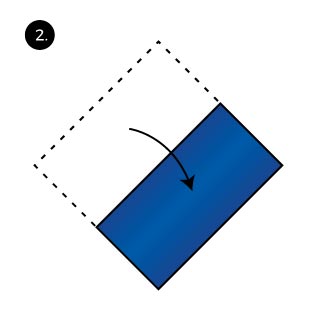 Fold in half to create a rectangle.
 Fold in half again to create a square.
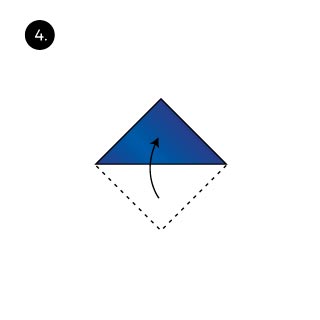 Fold up one corner to create a small triangle.
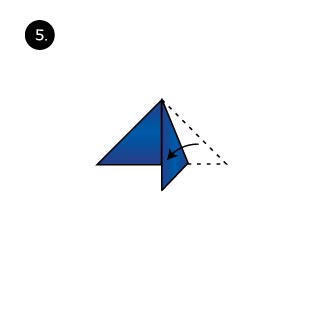 Fold in one edge to the center line of the triangle.
 Do the same with the opposite edge. Now the pocket square looks pointy like an arrow.
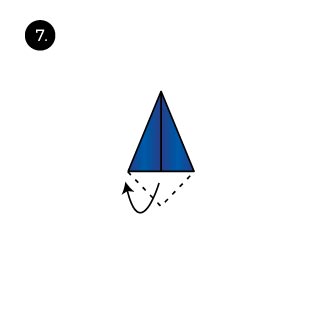 Fold back the lower side to create a pointy triangle.
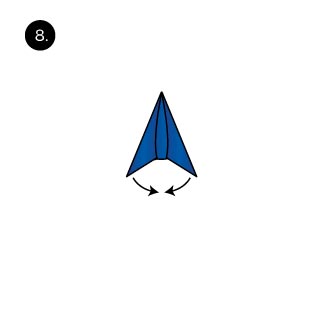 Now fold the triangle in half with the folds being on the outside.
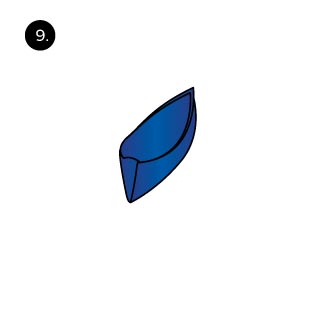 Open up the fold. It should look like the hull of a boat.
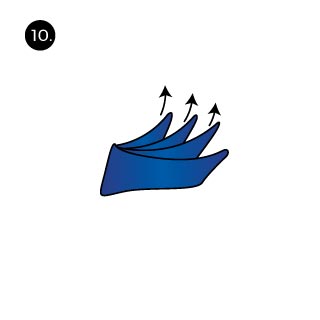 Now pull out each of teh inner 4 leaves
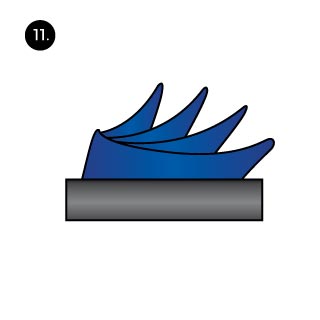 At last, place the pocket square into your breast pocket and style to your liking.
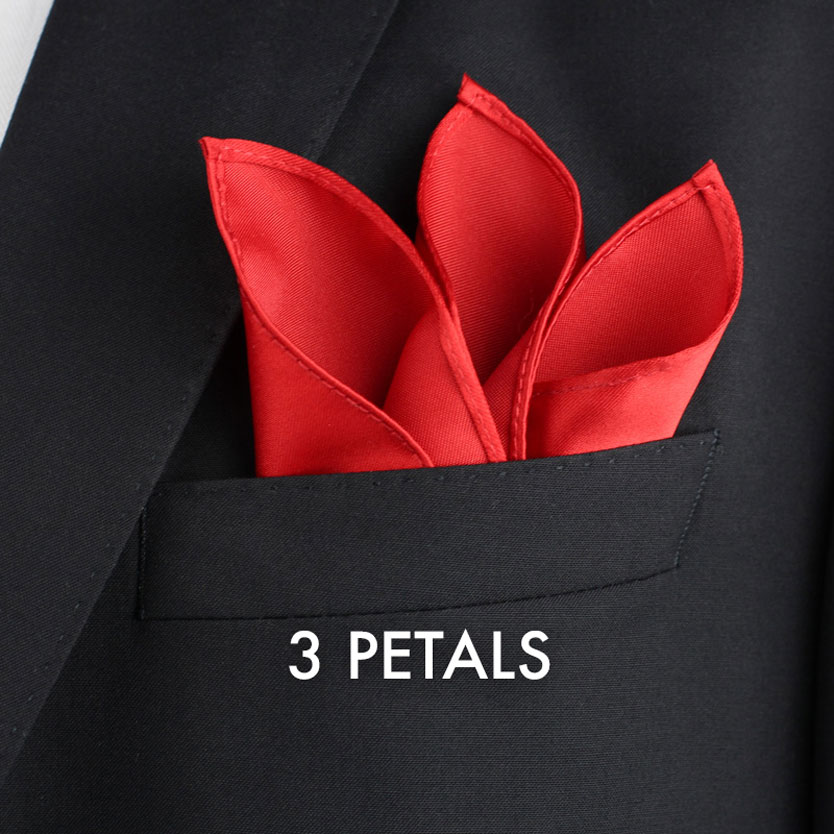
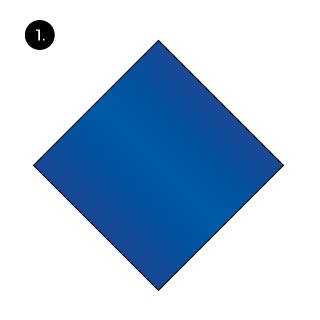 Start by laying your pocket square down flat.
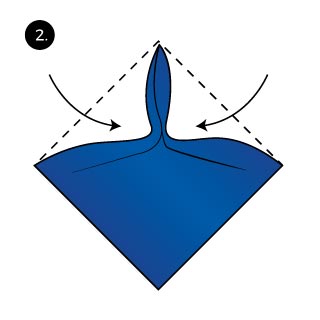 Next, pinch two sides to create the first petal at the center.
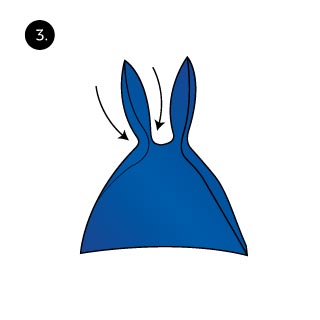 Now pinch another side to create the second petal.
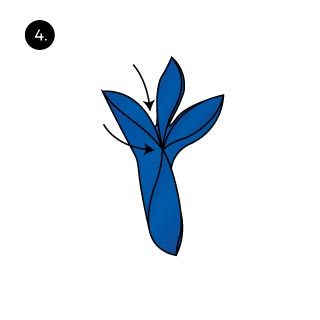 And once again, pinch a third side to create the third and final petal.
 At last, place the pocket square into your breast pocket with the three petals sticking out evenly.
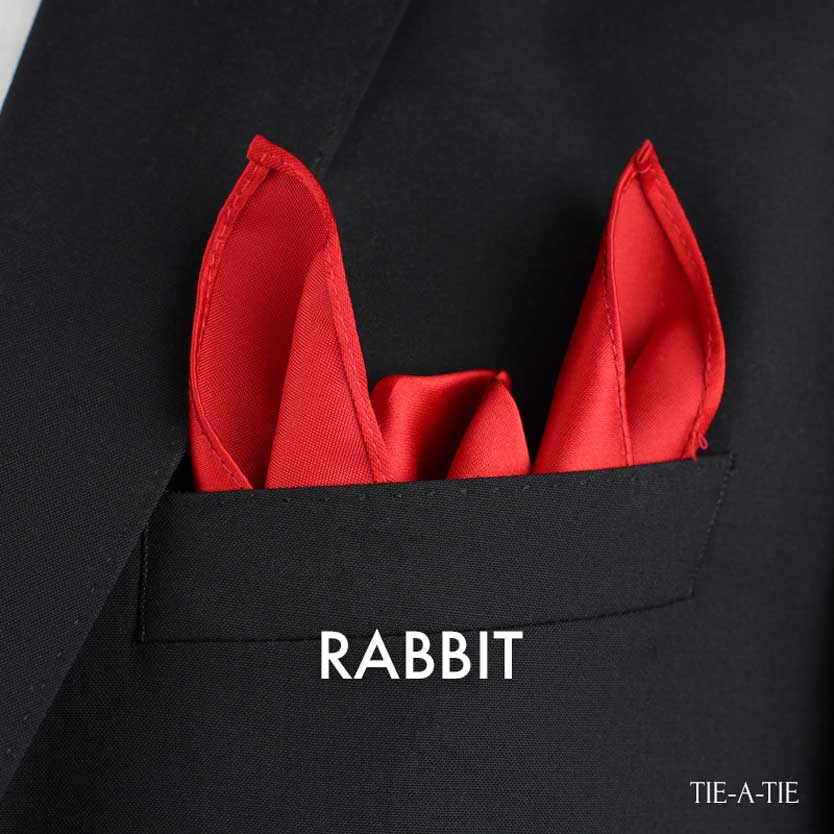
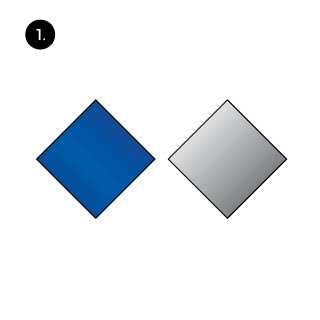
 Lay the pocket square down flat.
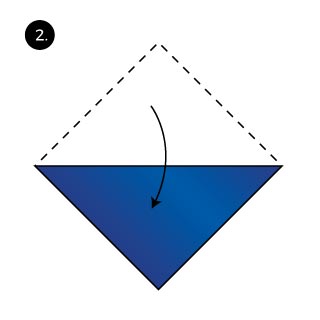 Fold in half to create a triangle.
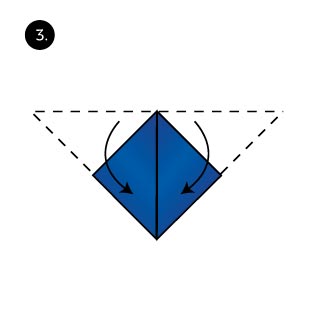 Fold down both corners to create a rectangle.
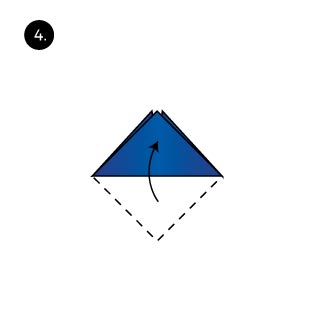 Fold up the bottom corner to create a small triangle again.
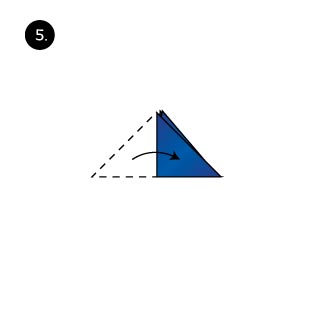 Fold over one side to create an even smaller triangle.
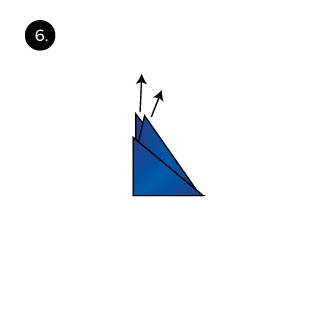 Now pull out the two inner corners.
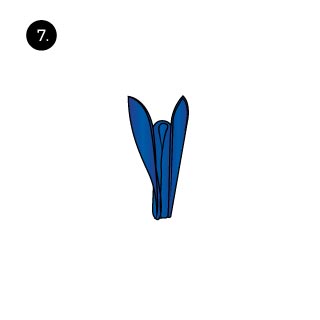 Open up the fold carefully.
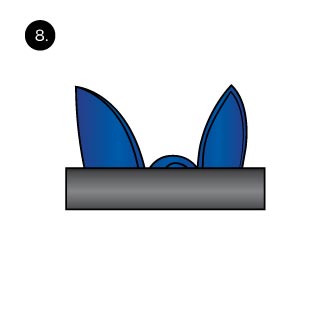 At last place the pocket square into your breast pocket. Pull out the two ears more and make sure that some of the center is showing. That’s all.
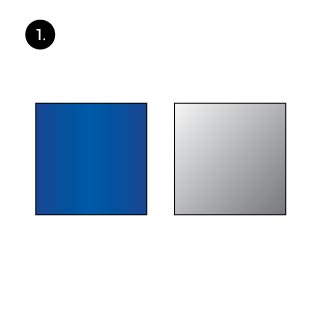
 Lay noth pocket squares down flat.
 Fold both in half to create two triangles.
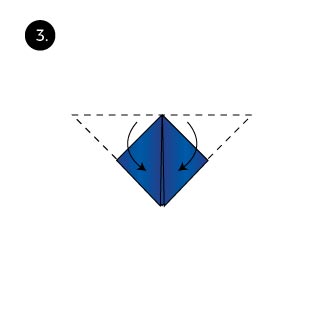 Now take the pocket square that you want in the center and fold down both tips of the triangle to create a rectangle.
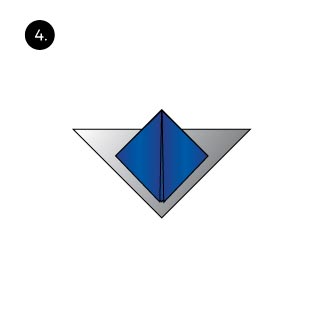 Lay the rectangle on top of the triangle. The rectangle should be about 1 inch higher than the triangle below.
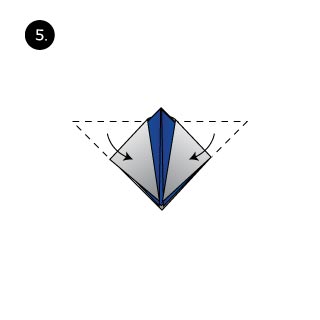 Fold down the wings of the triangle. This wraps the rectangle.
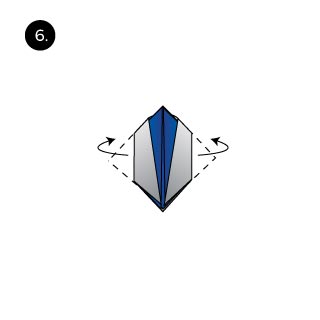 Fold back the right and left corner of the square containing both pocket squares. This is done to adjust the size so that the fold fits into your breast pocket.
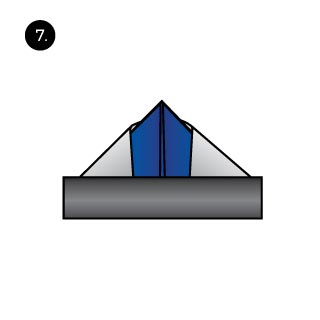 At last, tug the completed fold into your breast pocket.
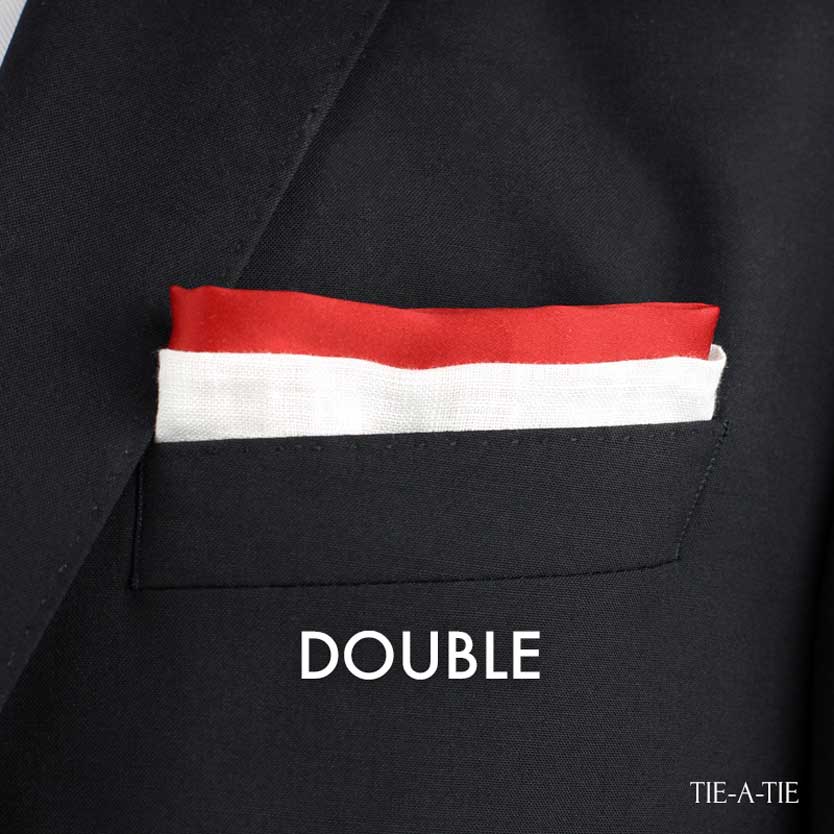
 Lay both squares down flat.
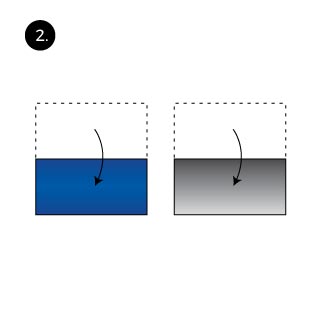 Next, fold both squares in half to create two equal rectangles.
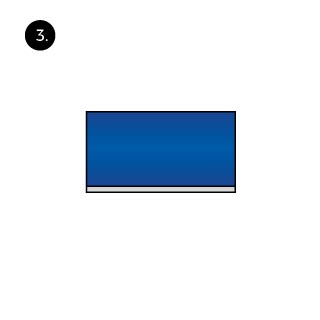 Now lay one rectangle over the other. About a 1/4 inch of the pocket square below should be showing on one long side.
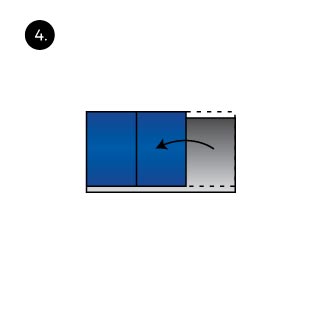 Fold the top square into thirds.
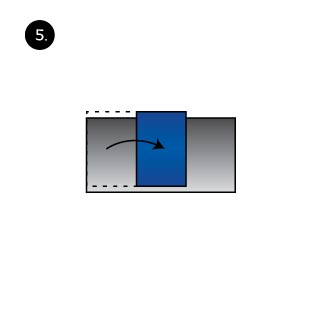 Fold over the other side.
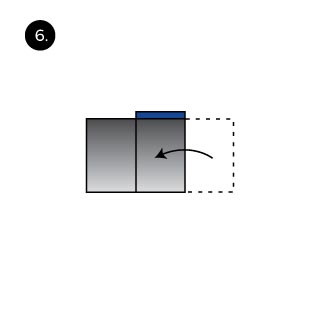 Now wrap the pocket square by folding the outer square around the inner square.
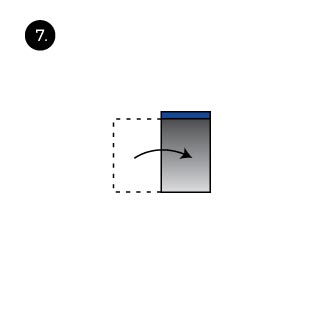 Fold both sides to create a complete wrap.
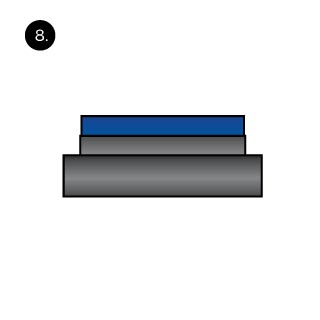 Turn the pocket square over so that the folds are hidden on the back side. Then, place the pocket square into your breast pocket. That’s all!
 Lay both squares down flat.
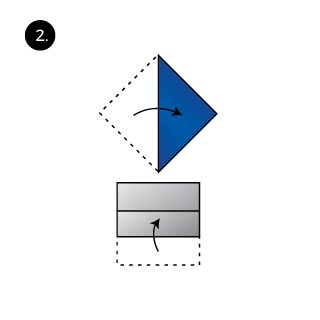 Fold the pocket square you want in the center into a triangle. The pocket square that creates the overcoat is fold into a rectangle.
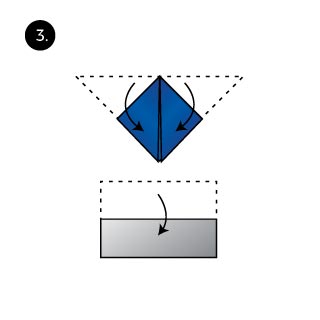 Fold both wings from the triangle down to crete a square. As for the rectangle, fold again to create a longer shaped rectangle.
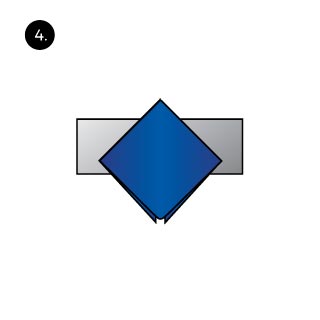 Lay the square on top of the rectangle.
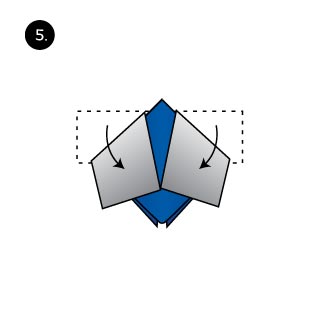 Fold the rectangle over the shoulders of the square.
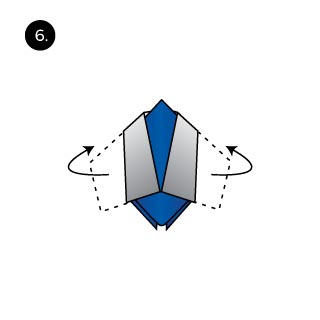 Fold back the overcoat to secure the center square.
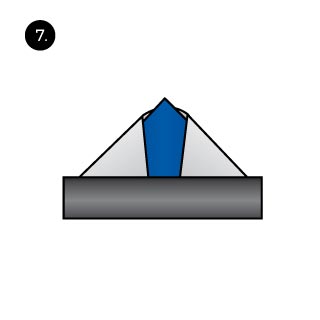 Place into your breast pocket and your are done!
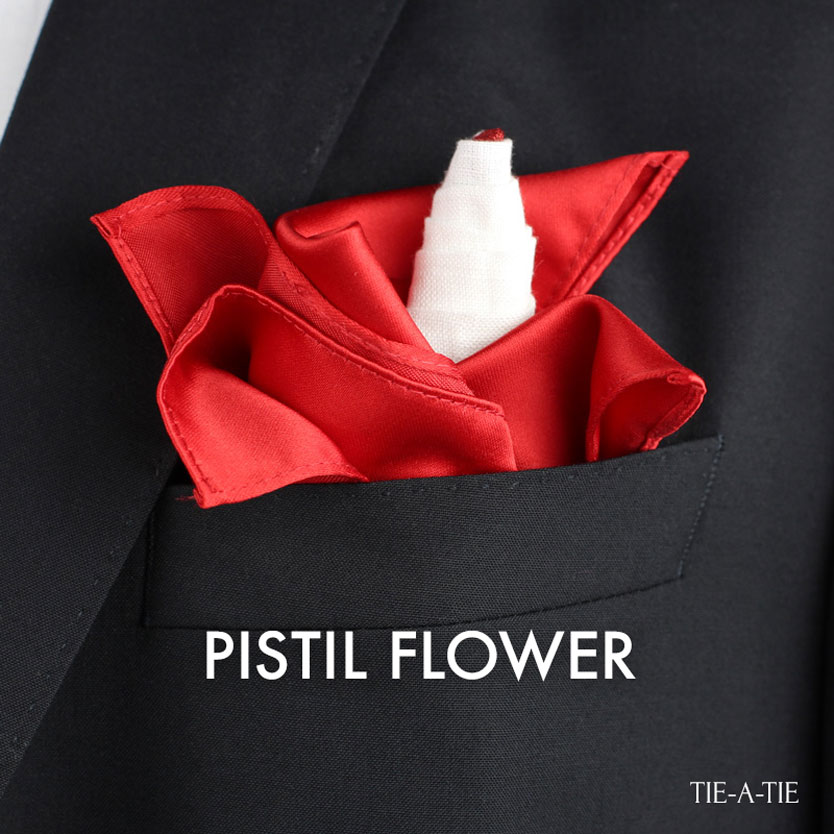
 Lay both pocket squares down flat.
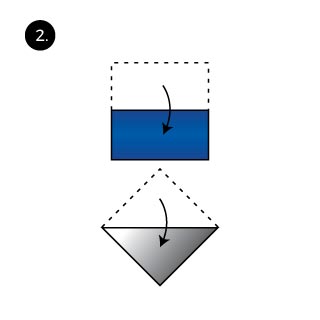 Fold the pocket square that creates the outer parts of the flower into a triangle. The center pocket square is folded into a rectangle.
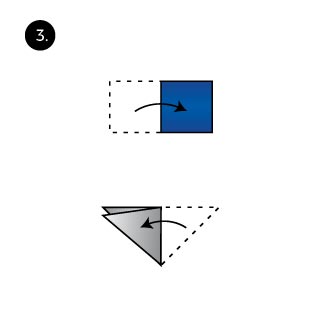 Fold the rectangle again to create the square. Also fold the triangle again in half to create a smaller triangle.
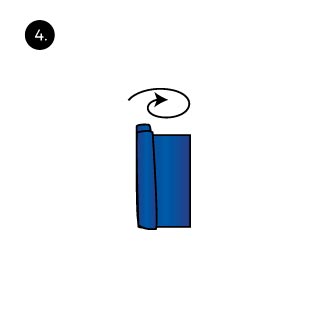 Roll up the square so that the center is visible at the top.
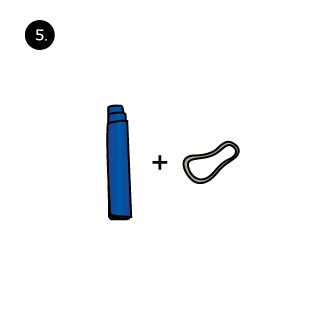 When rolled up all the way take a rubber band.
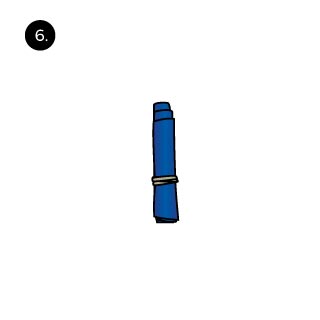 …and put the rubber band tightly around the bottom part of the roll.
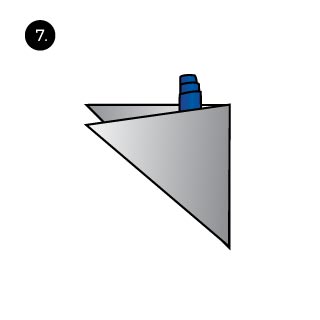 Place the roll into the center of the triangle. About 1-2 inches should stick out.
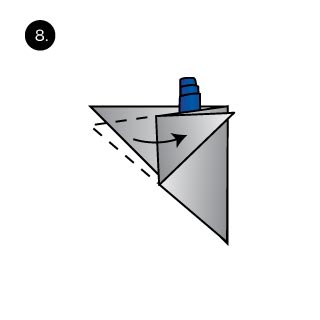 Fold back one of the corner.
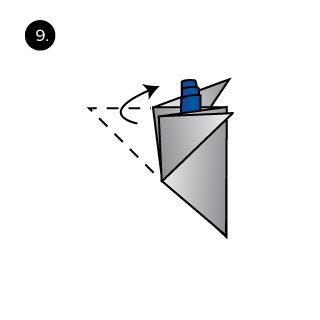 Now also fold back the other corner.
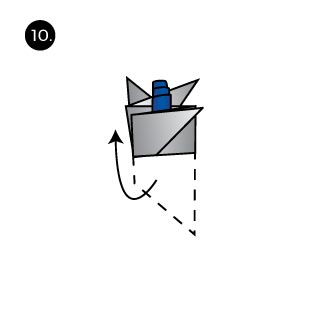 Fold up the bottom tip. Fold up high enough so that the tip is visible.
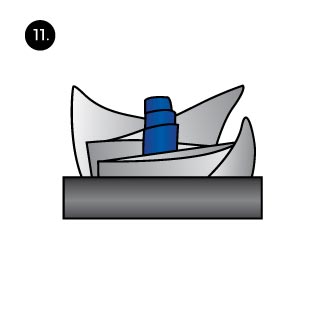 At last place the pocket square into your breast pocket.
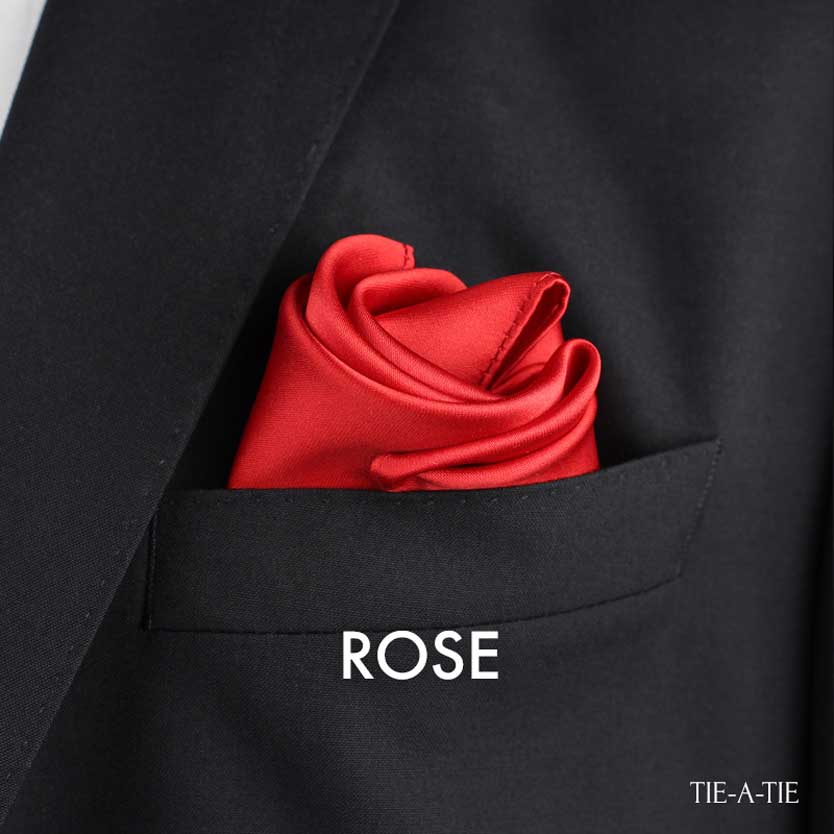
 Lay the pocket square down flat.
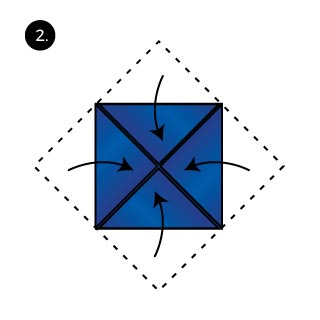 Fold in all corners so that the tips meet at the center.
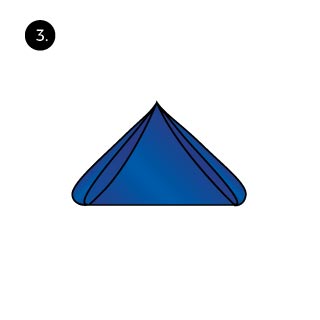 Pick up the pocket square by pinching all 4 corners as well as the center of the pocket square at the bottom.
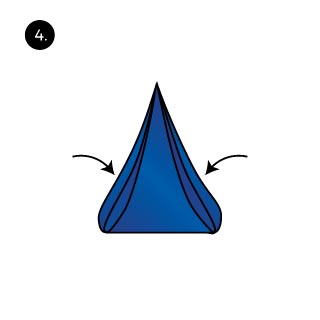 Bunch up the body of the pocket square by squeezing it with your other hand.
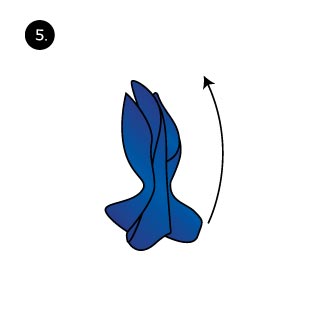 Turn the pocket square around so that tie corners are the the bottom.
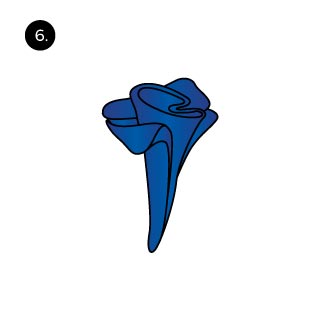 Roll the pocket square and fold open the petals of the rose.
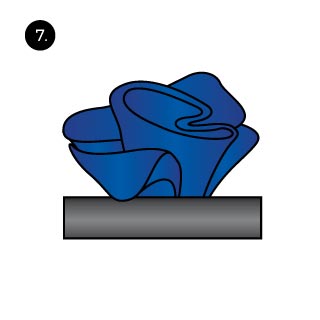 At last, tug the pocket square into your breast pocket.